Resurrecting 1970 GM AC with POA

Friendly format provided to inquire about automotive a/c systems.
Archived Forum

Moderators: bohica2xo, Tim, JohnHere

TheBandit
Posts: 28
Read the full article
Joined: Fri Aug 17, 2018 2:31 pm

Re: Resurrecting 1970 GM AC with POA

Post by TheBandit »

Thank you Dougflas. Yes my 1970 factory AC system did call for 11oz of mineral oil. The OE application for the compressor (2007+ Silverado) I'm using calls for 8oz of PAG46. Since this is a hybrid system, I'm not sure how much to use.

Here are some considerations:
Evaporator - OE 1970 unsure dimensions (Silverado is 10x10x2.6)
Condenser - Was tube/fin, now 14x24x3/4 parallel flow (Silverado is parallel flow 17x30x3/4)
Compressor - Was A6 now Denso 10S17 (Same as silverado)
Drier - New same size as OE 1970
Hoses - Shorter routing for suction line, otherwise similar lengths

I have read most of the oil is held in the compressor itself which makes me think I should lean toward the SIlverado specification. ALso my condenser is smaller than what's on a Silverado and I'd guess my evaporator is very similar in size. So I'm thinking 8oz of PAG 46.

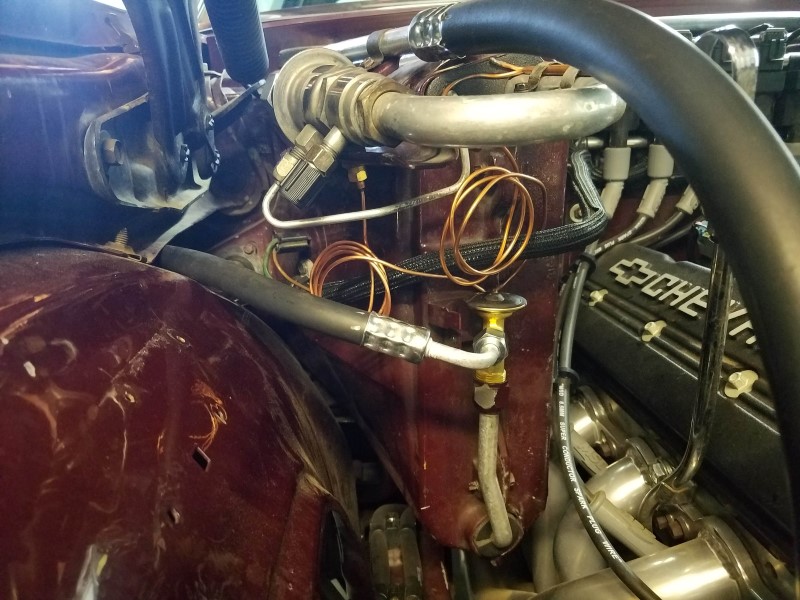
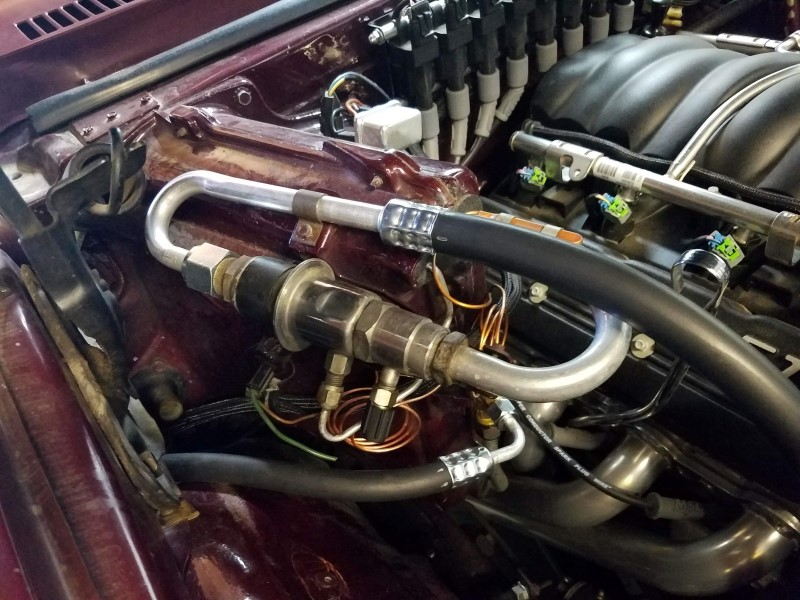
Yesterday I installed the POA suction valve and the new TXV with fresh o-rings throughout. The new TXV is not application-specific so the capillary tube for the sending bulb and the external equalizer line are much longer than they need to be. This results in some ugly coiled-up tubing, but at least the TXV is calibrated properly for R134a. I clamped the sensing bulb on top of the evaporator outlet using the original clamps.

Image

Image

Image

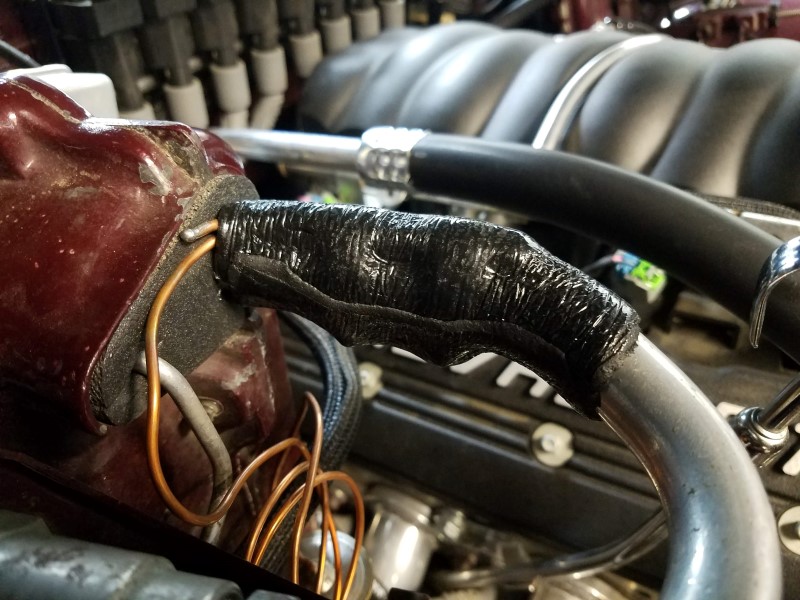
The sensing bulb must be insulated from the engine compartment otherwise it will react to fluctuating engine compartment temperatures and radiator wash instead of the evaporator. This requires the use of an insulation tape commonly referred to as Prestite. I ordered a foot of tape from Nostalgic Auto Air when I purchased a few other components. I was a bit confused because the tape has a white wax-paper backing on one side that removes easily and a clear cellophane cover on the other side that looks like it should be removed, but was terribly difficult to get off. I confirmed today the clear covering is meant to stay just on to keep it clean.

Image

Tonight I'll wrap the bulb and continue working to seal up the system. I have yet to install o-rings at the compressor and condenser and I also need to add compressor oil. Then I can work on wiring. My plan is to use a relay so the radiator fan is always on high when the compressor is on. Power to both the relay and the compressor clutch will be provided through the ambient temperature switch and hi/lo switch installed in the drier. The ambient temp switch will prevent compressor activation under 37F ambient tempt. The hi/lo switch will shut off the compressor for excess/unsafe pressure or undercharge.
TheBandit
Posts: 28
Joined: Fri Aug 17, 2018 2:31 pm

Re: Resurrecting 1970 GM AC with POA

Post by TheBandit »

I managed to wrap the TXV sensing bulb with a layer of insulation tape (aka cork tape or prestite tape). The insulation prevents the TXV from responding to engine bay and fan-wash temperatures.

Image

Image

Then I installed o-rings throughout the system and added compressor oil. I decided to use PAG46 because that is what's called for by the compressor. I added the oil through the suction port and rotated the compressor by hand to draw it into the system. The oil I'm using is NAPA Premium which is a house-labelled bottle of Dow chemical Ucon 244.

Image

Now that the system is completely sealed up, I can turn my attention to the wiring. For the compressor, my strategy is to use the original, non-cycling control method which will run the compressor any time the switch on the dash is set to an ac-demanding mode (Max, Norm, Defrost, etc). Cycling systems turn the clutch on and off to prevent low evaporator pressures from freezing up the system, but with this system the POA valve ensures the evaporator pressure is always high enough to prevent freeze-up. The TXV and POA valve regulate the flow of refrigerant so the compressor can run continuously.

In addition to the compressor control strategy, I needed to decide how to operate the engine fan. I've decided to run the fan at high speed any time the AC compressor is running. This is a "brute force" method of operating the fan, but it will ensure the refrigerant is condensed and supercooled as much as possible and that the engine will get maximum cooling as well. The drawback is fan noise, electrical draw and wear will always be at their highest even in low cooling demand such as when running the defroster or lower blower speeds. An alternative strategy is to use a trinary switch which would only turn the engine fan on if the system reached a high enough operating pressure (indicating higher cooling demand). I decided against this because from what I could tell, all the trinary switches on the market had relatively high pressure thresholds, for example the Vintage Air trinary switch would not turn on the fan until 254psi. I'd be concerned at that point that I would not have adequate capacity and the evaporator pressure (and temperature) might start to climb.

Currently the ECM controls a 2 speed engine fan based on engine coolant temperature. To trigger the fan relay, it provides ground signals for high or low speed. I am using a Volvo fan relay and found it will run high speed as long as the high input is grounded, regardless of whether or not the low speed input is grounded. My goal is for the fan control to operate normally with ECM control whenever the AC system isn't running,but override the ECM control when the AC is running. To do so I plan to wire in a relay to control the fans as shown below:

Image

Here is how I think this will operate:

Operation with AC Ctrl OFF:
- AC Fan Ctrl Relay and AC Compressor De-energized. ECM Hi Fan Signal provides ground to Hi Speed Fan Ctrl Relay to turn Engine Hi Fan on/off based on ECM control

Operation with AC Ctrl ON:
- AC Fan Ctrl Relay and AC Compressor Energized. AC Fan Ctrl Relay provides ground to Hi Speed Fan Ctrl Relay to turn Engine Hi Fan On whenever AC is running. Compressor runs at all times that AC Ctrl is On (non-cycling system).
- The ECM signal input is "floating" (i.e. not connected to ground or a load). Hopefully this does not trigger any ECM diagnostic codes.
- If the Ambient Temp Switch senses freezing air temperatures, the control reverts to “AC Off”.
- If refrigerant pressure goes below 30psi, the Hi/Low Pressure Switch opens, the control reverts to "AC Off"
- If refrigerant pressure goes above 406psi, the Hi/Low Pressure Switch opens, the control reverts to "AC Off"

I plan to wire this thing over the next couple days and hopefully I'll be ready to put a charge into the system by the end of the month.
Dougflas
Posts: 379
Joined: Mon Apr 18, 2016 6:10 pm

Re: Resurrecting 1970 GM AC with POA

Post by Dougflas »

Evacuate the system and put a little refrigerant in the system. You do not want the system to be at negative pressure.
TheBandit
Posts: 28
Joined: Fri Aug 17, 2018 2:31 pm

Re: Resurrecting 1970 GM AC with POA

Post by TheBandit »

Dougflas wrote:Evacuate the system and put a little refrigerant in the system. You do not want the system to be at negative pressure.
I don't understand your comment. Right now the system was just freshly assembled. I haven't drawn a vacuum on it yet, so it shouldn't be at negative pressure. As soon as I have the wiring done I will pull a vacuum on it to remove air and moisture then charge it.
Dougflas
Posts: 379
Joined: Mon Apr 18, 2016 6:10 pm

Re: Resurrecting 1970 GM AC with POA

Post by Dougflas »

There is currently moisture in the system. Pulling a vacuum will boil it off. Put some refrigerant in the system at this point. you want the system to be pressurized.
TheBandit
Posts: 28
Joined: Fri Aug 17, 2018 2:31 pm

Re: Resurrecting 1970 GM AC with POA

Post by TheBandit »

I didn't snap photos of the wiring but I got that done last week. I was faithful to the wiring diagram in my previous post. To test, I bypassed the safety switch and confirmed the clutch and high speed fan were triggered when the AC was turned on. Everything was working properly so I headed to a buddy's shop to charge the system.

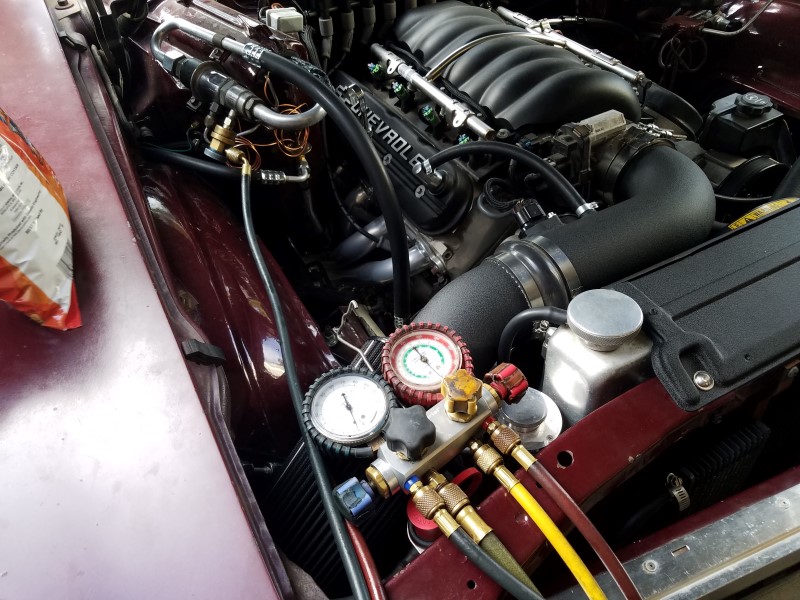
My buddy runs a mobile refrigeration business and he kindly offered to lend his tools, time, and expertise to help charge my system. He has not worked with a POA system before so this was a little new to him. We started out by vacuuming the system down for about 45mins. His pump seemed to get us around 28 inHg.

Image

Image

Before I came, I had a plan for determining charge amount. I wanted to start by adding a low charge (around 2lb), then add 0.5oz increments of refrigerant while monitoring the high side pressure. I was going to look for the plateau where adding refrigerant did not noticeably affect the high side pressure. This would indicate the receiver was starting to fill with liquid. Then when the pressure began to rise again / spike, this would indicate the receiver was full of liquid and the bottom of condenser was also beginning to fill. Thereabouts would be my stopping point.

We started by adding the initial 2lb charge amount. The compressor and hi engine fan turned on as expected and we gave the system some time to settle. During this time the engine was idling, the blower was on high, and the compressor was running continuously. The blower was getting outside air instead of recirculating, because the factory system relies on vacuum controls and I don't have the vacuum hooked up yet.

As we charged, I noticed frost forming after the POA valve. This is normal behavior when there is a lot of suction from the compressor such as during low loads or low charge levels. The pressure drop through the POA valve makes it act like a second expansion valve and you get additional cooling downstream. Here’s a photo showing the frostline where the pressure drops after the POA.

Image

At this point we measured the air going into the cowl where the blower was pulling from. It was over 107F due to engine wash. Then we measured inside the car and found 52.2F coming out of the center vents – not too shabby! Pressures were 27psi in the evaporator (where I set the POA!) and 145psi on the high side. Ambient was about 75F. The system was working and considering the cowl temperatures, I’d say it was working very well! All values measured at idle, blower high, outside air (non-recirc), engine fan hi, doors open, hood up.

If we had proceeded with the original plan, we would have added 0.5oz and continued to monitor pressures to see how things changed. But from here forward things went sideways. Instead of incrementing in 0.5oz, we added a whopping 0.55lb. Pressures went up to 38psi in the evaporator and 250psi on the high side. Yet somehow vent temperatures only went up slightly to 53.6F. Maybe I misrecorded that value because I would have expected higher.

With the high 250psi high-side pressure and no regulation from the POA valve, we thought we may have overcharged the system. So we began recovering charge in unknown amounts. Eventually we got the system back down to a steady 32psi in the evaporator, 165 on the high side, and 59F coming out of the center vents with cowl temperatures still over 100F. Unfortunately I was out of time and I needed to head home.

Where does this leave me? I have a questionable/unknown charge in the system now, but it does work. I think I’d like to get the recirc ducting working, evacuate the system, and start over with my original plan to determine charge amount.

I did take a video last night just starting the car in the garage. The car was idling, hood down, high blower, outside air, ambient just over 70F. I got a frigid 40F from the center vent! I’m most certainly happy with that! Here’s a video showing how the outlet temp came down when I turned on the AC.

https://youtu.be/bnsq9LjBRSo
TheBandit
Posts: 28
Joined: Fri Aug 17, 2018 2:31 pm

Re: Resurrecting 1970 GM AC with POA

Post by TheBandit »

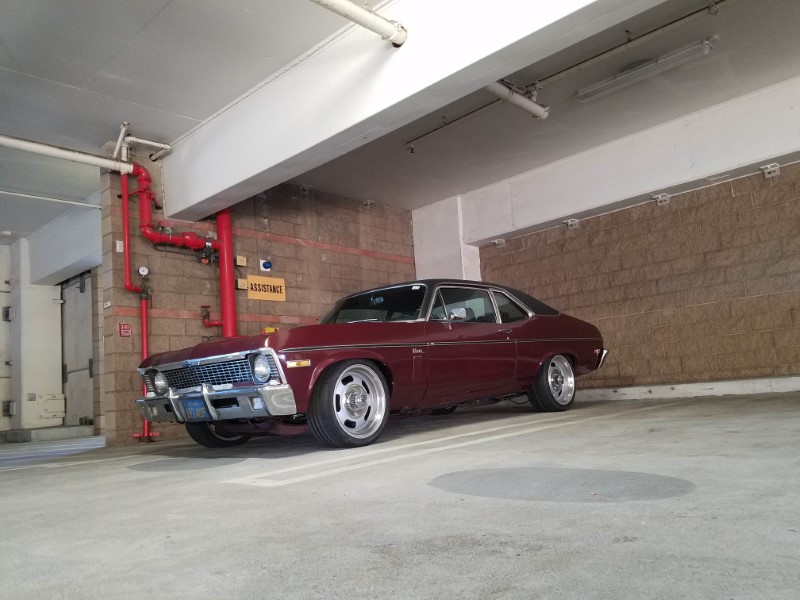
Earlier this month I took the Nova to work.

Image

There's something magical about the reverberation of a V8 idling into a parking structure. It brought back memories from taking this car to my high school prom and setting off all the fast & furious kid's car alarms as I rolled in. Driving this car to work makes my day so much better. It gives me something to look forward to at lunch and again at the end of the day. And I can't tell you how happy I am with the decisions & compromises I've made to keep this car comfortable and reliable as a driver; no big crazy cam, no overly stiff suspension, investment in safety and visibility, etc. The car continues to provide much needed therapy now two years since getting the LS swap running.

On that particular day, I took the Nova out for lunch and had my first opportunity to see how the AC was working. Weather reports said it was in the low 80s. Cruising around I was getting vent temps around 85F (ac off, outside air, hi blower). When I stopped, that would climb to around 90F. While stopped, a turned on the AC to see how quickly the vent temps would drop and to what level. Here is a video.

https://youtu.be/4l4t2BhY2K4

In the course of 30sec the outlet temps went from 90F down to 50F and stayed around there. This with AC on, outside air, and hi blower. 50F is higher than I'd like to see, but I think the lack of recirc is a big factor when pulling 90F air from outside. Here is what happened after driving the car:

https://www.youtube.com/watch?v=9LZ3kfoVCpc

It was hard for me to see while driving, but I think the outlet was around 42F. I don't know if most of that drop was due to lower inlet and under hood temperatures or more air flow across the condenser; I suspect the former. Later on the way home, with ambient in the high 70s, I saw 38-40F from the vents.

Image

While I'm happy so far with the performance, I know I'm leaving a lot on the table using outside air. The factory system uses a set of vacuum operated flaps to direct blower air either from the cowl (current default) or from the inside passenger kick panel, but I haven't had the vacuum connected. So after that run I took the time to hook it up. I connected the vacuum supply with a reducing tee on at the back of the manifold, sharing the port with the transmission vacuum modulator. I also installed a heater bypass valve on the passenger fender.

Image

The operation of this system is dictated by a vacuum control valve attached to left-most AC control lever in the cabin. In the "Max AC" position, vacuum should be supplied to the heater core valve to bypass flow to the heater and the duct flaps should actuate to recirculate air from the cabin. After I got the system connected, I had my 5yo daughter keep an eye on the recirculation flap in the passenger kick panel to see if it was operating correctly. What I expected was for the flap to open with the control lever in the "Max AC position" and remain closed otherwise. Here is a video of our test:

https://youtu.be/lyUn2M1-7XU

We found the recirculation mode was happening with control lever in the "Vent" position and not in "Max AC" or other positions. I'll have to investigate why this is happening. This probably will mean pulling the controls apart to test the vacuum control valve. I am curious if there is an adjustment or mounting issue that could cause this.
B52bombardier1
Posts: 37
Joined: Sat Aug 31, 2019 6:21 pm

Re: Resurrecting 1970 GM AC with POA

Post by B52bombardier1 »

Excellent write up here and I also had a Nova is high school. Very well done here but I do have a question. Since it appears that Doc's Blocks is no longer in business, who would you buy your connectors and fittings at the compressor from? I'm about to embark on adding Classic Air to my 70 El Camino while trying to lash it up with the original Denso compressor low mounted on a 1999 LM7 5.3 liter engine out of a 1999 GMC Sierra.

Many thanks,

Rick
1970 Chevrolet El Camino 5.3 L LM7 Truck Engine & 4L60E Transmission
Dougflas
Posts: 379
Joined: Mon Apr 18, 2016 6:10 pm

Re: Resurrecting 1970 GM AC with POA

Post by Dougflas »

I should have some of the older o ring fittings as long as Tim does not have them.
69supercj
Posts: 1
Joined: Tue Sep 24, 2019 12:43 pm

Re: Resurrecting 1970 GM AC with POA

Post by 69supercj »

Great write up!. I'm in the beginning stages of adding an underdash evap from a '66 Mustang to my '66 F-100. Some of this info was helpful!!
Post Reply